What to Expect During a Commercial Sign Installation
Installing a new commercial sign is an exciting milestone for any business. Whether you are opening a new location, updating an existing storefront, or replacing an outdated sign, the installation is the moment when your business identity truly comes to life.
Knowing what to expect during a commercial sign installation can help you prepare your property, employees, and customers. While every project is different, most professional sign installations follow a similar process.
Final Planning Before the Installation
Before installation day, your sign company will review the approved drawings, installation location, access requirements, and permit documents.
The installation team may also confirm important details such as:
- The scheduled installation date and arrival window
- Building access requirements
- Electrical connection locations
- Parking or loading-area access
- Equipment placement
- Tenant or property management restrictions
- Approved sign placement and mounting details
If your project requires a permit, the permit should typically be issued before the installation begins. The sign should also be fabricated according to the approved design and landlord criteria.
A professional sign company will coordinate these details in advance to help the installation run smoothly.
Preparing the Installation Area
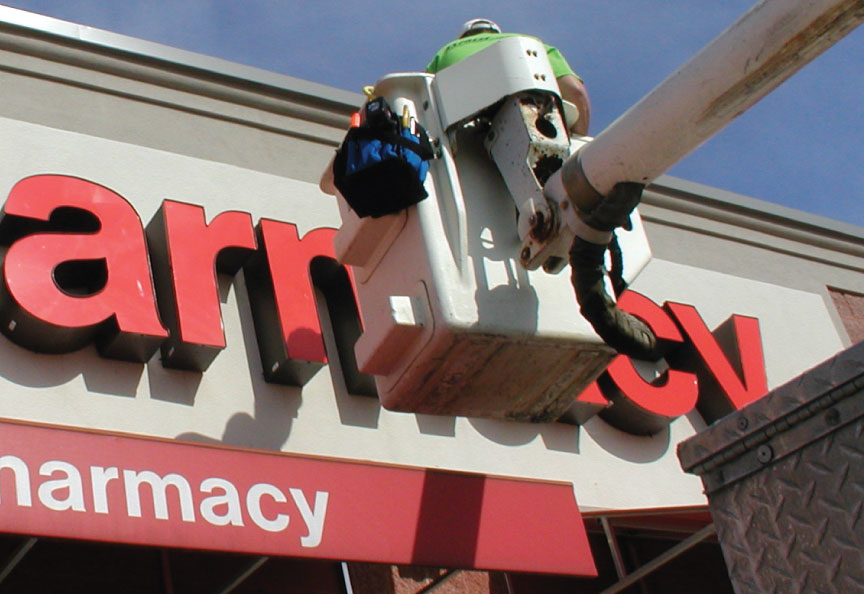
Commercial signs often require specialized equipment, including bucket trucks, cranes, ladders, scaffolding, or lifts. Because of this, the installers need enough space to safely access the installation area.
Before the installation crew arrives, you may be asked to:
- Move vehicles away from the work area
- Keep loading zones or parking spaces clear
- Remove furniture or merchandise near interior work areas
- Notify employees about the installation
- Coordinate access with the property manager
- Provide access to electrical panels or utility rooms
In some cases, a portion of a sidewalk, driveway, parking lot, or storefront entrance may need to be temporarily restricted.
The installation team will usually establish a safe work zone using cones, caution tape, barriers, or other safety equipment.
Removing an Existing Sign
If an old sign is being replaced, the installation may begin with sign removal.
The crew will carefully disconnect electrical components, remove mounting hardware, and lower the existing sign from the building. Depending on the project, the old sign may be disposed of, recycled, returned to the customer, or stored for future use.
Removing an existing commercial sign can sometimes reveal wall damage, faded paint, old holes, electrical issues, or differences in the building finish.
These conditions may not be visible until the original sign is removed. Your sign company should let you know if additional repairs or modifications are needed before the new sign can be installed.
Inspecting the Building Surface
Before mounting the new sign, the installers will inspect the wall, fascia, monument structure, or other installation surface.
They may verify:
- Wall construction
- Stud or structural support locations
- Electrical access
- Mounting conditions
- Sign placement measurements
- Obstructions behind or around the wall
- Existing damage or deterioration
Commercial signs must be attached to a stable surface using appropriate installation hardware. Larger or heavier signs may require structural supports, engineered attachment methods, or backing materials behind the wall.
If the wall surface is damaged or unable to support the sign safely, repairs may be required before installation continues.
Positioning and Mounting the Sign
Once the installation area is prepared, the crew will position the sign according to the approved drawings.
Installers may use paper patterns, templates, measurements, lasers, or mounting guides to ensure the sign is properly aligned.
Depending on the sign type, the installation process may include:
- Drilling mounting holes
- Installing anchors or support brackets
- Mounting raceways or wireways
- Attaching individual channel letters
- Installing sign cabinets
- Securing monument sign panels
- Mounting dimensional letters or logos
- Sealing wall penetrations
- Routing electrical wiring
The amount of time required will depend on the sign’s size, design, weight, height, and installation conditions.
Electrical Connections for Illuminated Signs
Illuminated commercial signs require an electrical connection. In many cases, the building must have electrical power available near the approved sign location.
During installation, qualified personnel may connect the sign wiring to the building’s electrical system. The sign will then be tested to confirm that the lighting operates correctly.
The installation team may check:
- LED illumination
- Power supplies
- Timers or photocells
- Disconnect switches
- Wiring connections
- Light consistency
- Sign brightness
- Electrical safety
If the required electrical connection is not available, additional electrical work may be needed before the sign can be fully activated.
It is helpful to confirm electrical requirements early in the project so they do not delay the installation.
Temporary Noise and Access Limitations
Commercial sign installation involves tools, equipment, drilling, and vehicle movement. As a result, there may be temporary noise or limited access near the work area.
Most installations can be completed while the business remains open. However, customers and employees may need to use a different entrance or avoid certain parking spaces for a short period.
For busy retail centers, restaurants, medical offices, or other high-traffic properties, installation may be scheduled during slower business hours.
Some property owners also require installation work to take place before opening, after closing, or during specific approved hours.
How Long Does a Commercial Sign Installation Take?
Many smaller commercial signs can be installed in several hours. Larger or more complex projects may require a full day or multiple days.
The installation timeline may depend on:
- Sign size and weight
- Building height
- Number of sign components
- Electrical requirements
- Type of mounting surface
- Equipment access
- Weather conditions
- Traffic control requirements
- Existing sign removal
- Unexpected site conditions
For example, installing a set of channel letters on a single-story storefront may take less time than installing a large sign cabinet on a multi-story building.
Your sign company should provide an estimated installation schedule before the work begins.
Weather and Installation Delays
Weather can affect the safety and timing of a commercial sign installation.
High winds, heavy rain, lightning, or other unsafe conditions may require the installation to be postponed. Wind is especially important when installers are working with cranes, bucket trucks, or large sign panels.
A weather-related delay can be inconvenient, but protecting workers, customers, vehicles, and the property should always come first.
Your sign company will typically reschedule the installation as soon as conditions are safe.
Inspections and Permit Closeout
Many permitted sign projects require a final inspection after installation.
Depending on the city and sign type, the inspector may verify:
- Sign location
- Sign dimensions
- Electrical connections
- Structural attachment
- Approved plans
- Required clearances
- Compliance with the issued permit
Some signs may require separate building and electrical inspections.
Your sign company may coordinate the inspection and address any corrections required by the city. Once the inspection is approved, the permit can be finalized or closed.
Final Testing and Cleanup
After the sign is installed, the crew will complete a final review.
This often includes checking the sign’s alignment, attachment points, finish, electrical operation, and overall appearance.
The installers should also remove packaging, debris, excess materials, and safety barriers from the work area.
For illuminated signs, it is helpful to view the sign both during the day and after dark. Minor lighting adjustments may be easier to identify at night.
What Should the Business Owner Inspect?
Before the installation crew leaves, take a few minutes to review the completed sign.
Look for:
- Proper alignment
- Correct spelling
- Consistent spacing
- Clean installation areas
- Secure mounting
- Even illumination
- Correct colors and finishes
- Visible wall damage
- Proper sign placement
If you notice a concern, bring it to the installer’s attention. Small adjustments can often be handled before the equipment is removed from the site.
Tips for a Smooth Commercial Sign Installation
A successful installation begins with good preparation and communication.
To help keep your project on schedule:
- Confirm landlord approval early
- Complete permit requirements before installation
- Make sure electrical power is available
- Keep the installation area clear
- Notify employees and nearby tenants
- Provide accurate building access information
- Confirm property management work-hour restrictions
- Communicate any site changes to the sign company
These steps can prevent unnecessary delays and help the installation team work safely and efficiently.
Work With an Experienced Commercial Sign Company
A commercial sign installation involves more than simply attaching a sign to a wall. It requires planning, proper equipment, qualified installers, electrical coordination, safety procedures, and attention to local code requirements.
Working with an experienced commercial sign company can make the entire process easier—from design and permitting through fabrication and final installation.
At RSL Signs, we help businesses manage every stage of their commercial signage project. Our team works to provide professional communication, careful planning, and quality installation throughout Southern California.
Whether you need channel letters, building signs, monument signs, dimensional lettering, illuminated signage, or a complete sign package, we can help bring your vision to life.
Contact RSL Signs to discuss your upcoming commercial sign installation and request a custom quote.